最近想着将公司里 Confluence 的内容拿来跑个智能知识库系统练练手,学习的是 Jiayuan (Forrest) 大大的 http://devv.ai 是如何构建高效的 RAG 系统的 这篇文章,找了一圈最终直接用的项目是 Langchain-Chatchat,结果在一启动的时候就报错了个错,UserWarning: CUDA initialization: The NVIDIA driver on your system is too old (found version 11080).,很明显,它是告诉我显卡驱动版本太低了,需要更新。这里其实有两种方式:
- 降低
pytorch的版本 - 升级显卡驱动
先确定本机的驱动信息,以及项目的 pytorch 版本所对应的 cuda 版本信息。
基本信息
nvidia-smi
最开始的时候是单卡,初始的信息记录
$ lspci | grep -i nvidia
af:00.0 3D controller: NVIDIA Corporation GP102GL [Tesla P40] (rev a1)

$ nvidia-smi
+-----------------------------------------------------------------------------+
| NVIDIA-SMI 520.61.05    Driver Version: 520.61.05    CUDA Version: 11.8     |
|-------------------------------+----------------------+----------------------+
| GPU  Name        Persistence-M| Bus-Id        Disp.A | Volatile Uncorr. ECC |
| Fan  Temp  Perf  Pwr:Usage/Cap|         Memory-Usage | GPU-Util  Compute M. |
|                               |                      |               MIG M. |
|===============================+======================+======================|
|   0  Tesla P40           Off  | 00000000:AF:00.0 Off |                    0 |
| N/A   28C    P8     9W / 250W |      9MiB / 23040MiB |      0%      Default |
|                               |                      |                  N/A |
+-------------------------------+----------------------+----------------------+

+-----------------------------------------------------------------------------+
| Processes:                                                                  |
|  GPU   GI   CI        PID   Type   Process name                  GPU Memory |
|        ID   ID                                                   Usage      |
|=============================================================================|
|    0   N/A  N/A      2113      G   /usr/lib/xorg/Xorg                  4MiB |
|    0   N/A  N/A      7618      G   /usr/lib/xorg/Xorg                  4MiB |
+-----------------------------------------------------------------------------+

$ nvcc --version
nvcc: NVIDIA (R) Cuda compiler driver
Copyright (c) 2005-2022 NVIDIA Corporation
Built on Wed_Sep_21_10:33:58_PDT_2022
Cuda compilation tools, release 11.8, V11.8.89
Build cuda_11.8.r11.8/compiler.31833905_0
项目依赖的 CUDA 版本
通过简单的脚本能看到项目依赖的 cuda 版本为 12.1
~/Langchain-Chatchat$ python
Python 3.11.5 (main, Sep 11 2023, 13:54:46) [GCC 11.2.0] on linux
Type "help", "copyright", "credits" or "license" for more information.
>>> import torch;
>>> print(torch.__version__)
2.1.2+cu121
>>> print(torch.version.cuda)
12.1
>>>
方案评估
降低 pytorch 版本
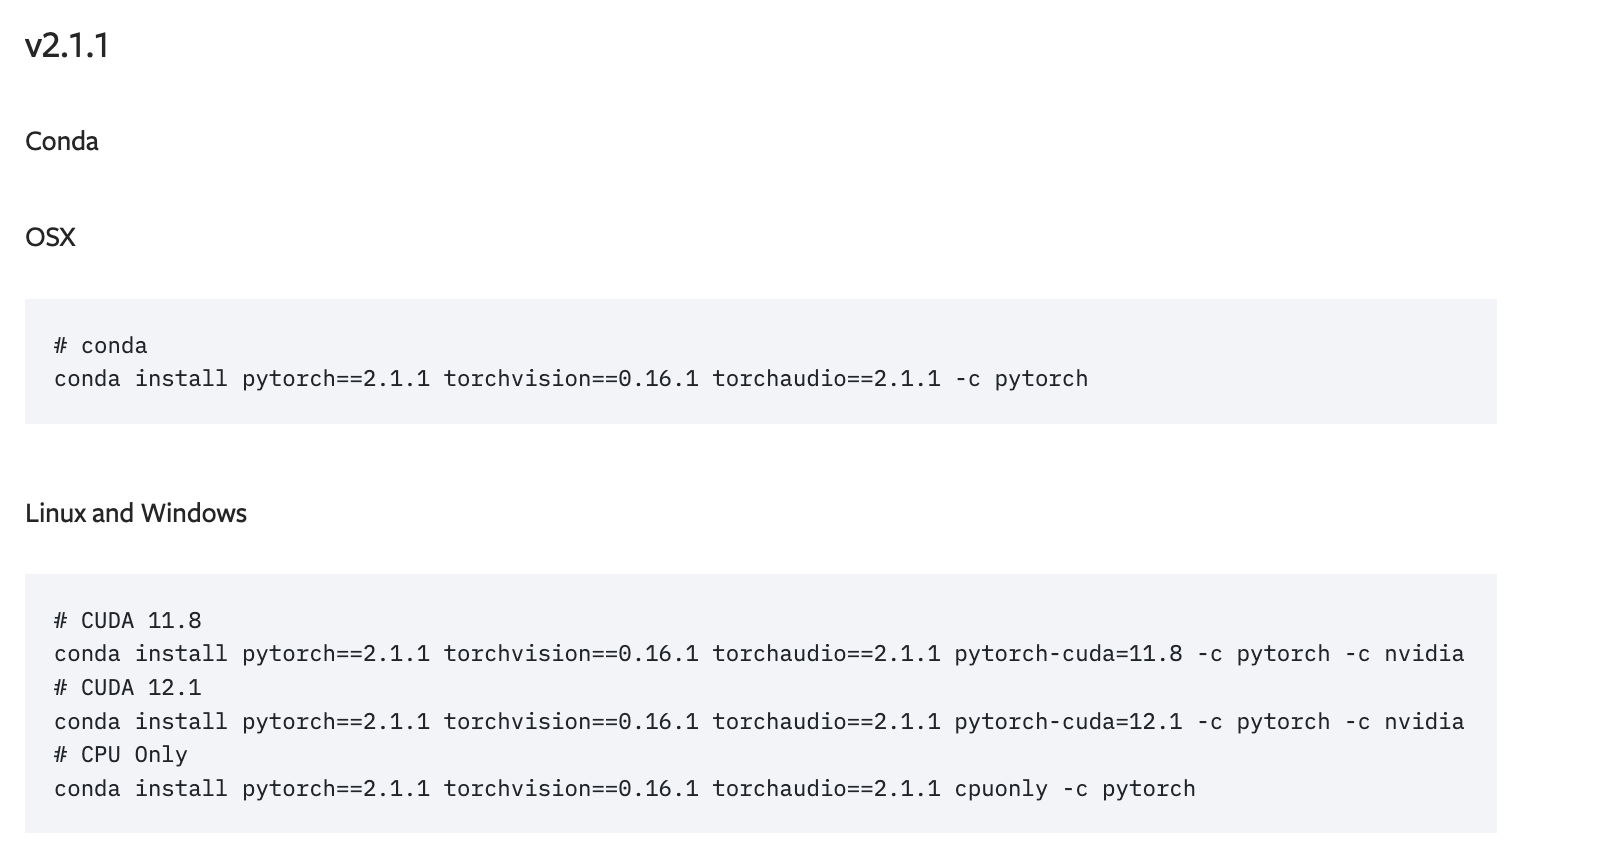
这个比较简单,直接去 pytorch 的官网 找到对应的版本,然后安装就行了。其实通过上面的信息发现,项目所依赖的版本与本机驱动能支持的版本只差一个小版本号 2.1.2 <- 2.1.1,但是这意味可能要去修改代码。
升级显卡驱动
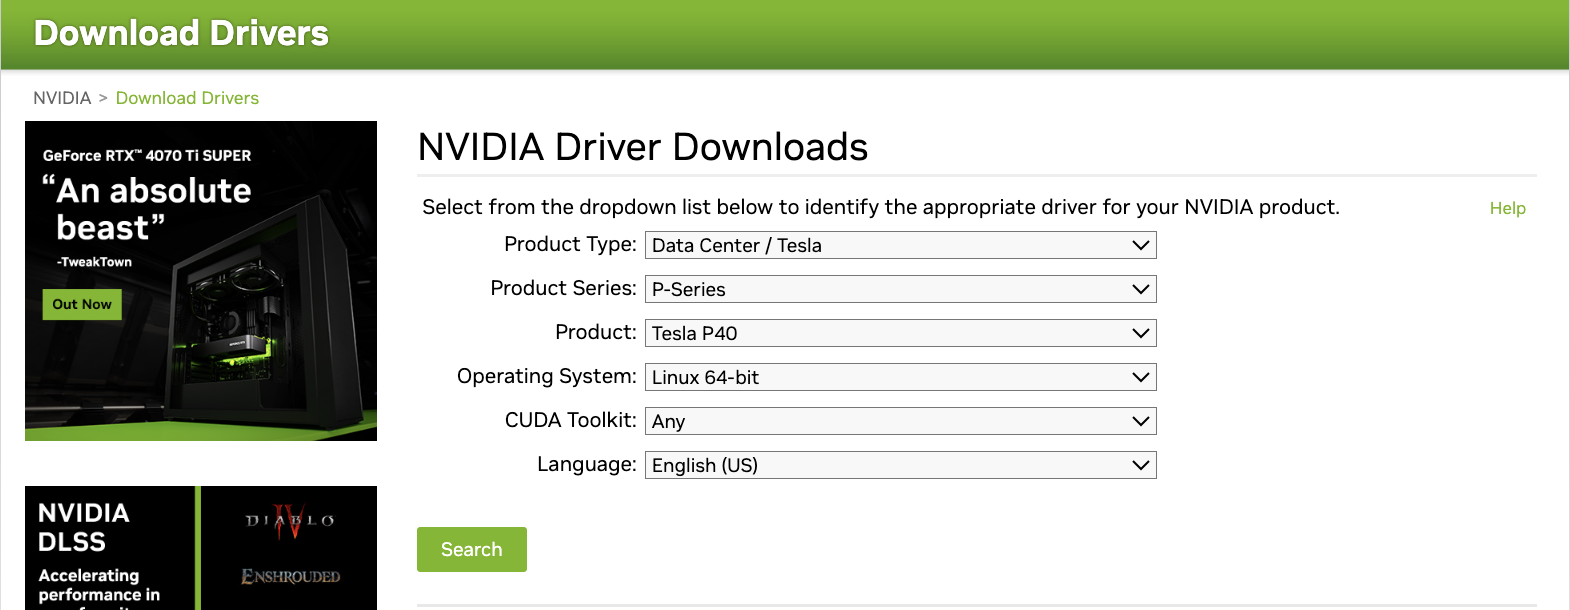
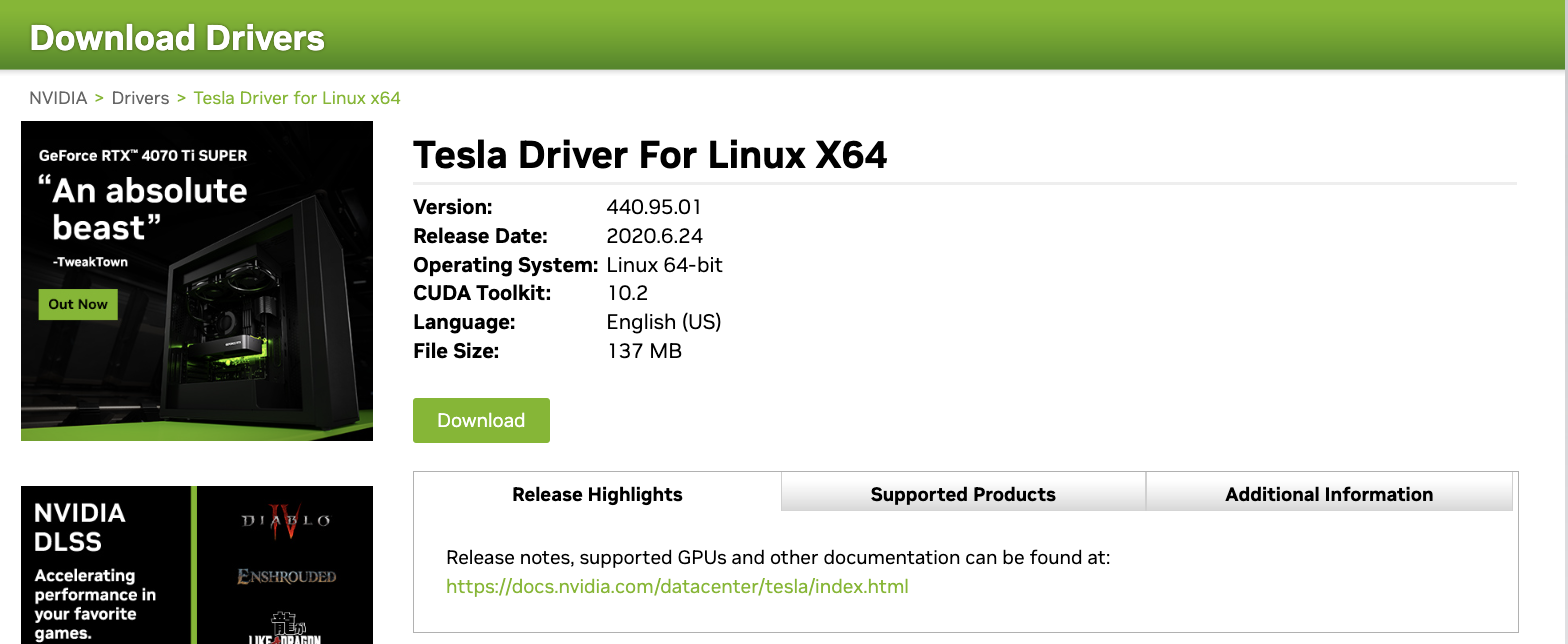
简单来说就是先卸载,再重新安装,安装的方式也多种多样:
- 通过
apt安装 - 从 nvidia 的官网找到对应的显卡驱动安装
- 直接安装 CUDA Toolkit 会带上对应驱动
不过理论上这种方案是会直接被 pass 掉的:
- 涉及到硬件驱动
- 多人共享,多任务运行
- 升级的结果不可测
- 机房服务器,没有太多操作经验
具体执行
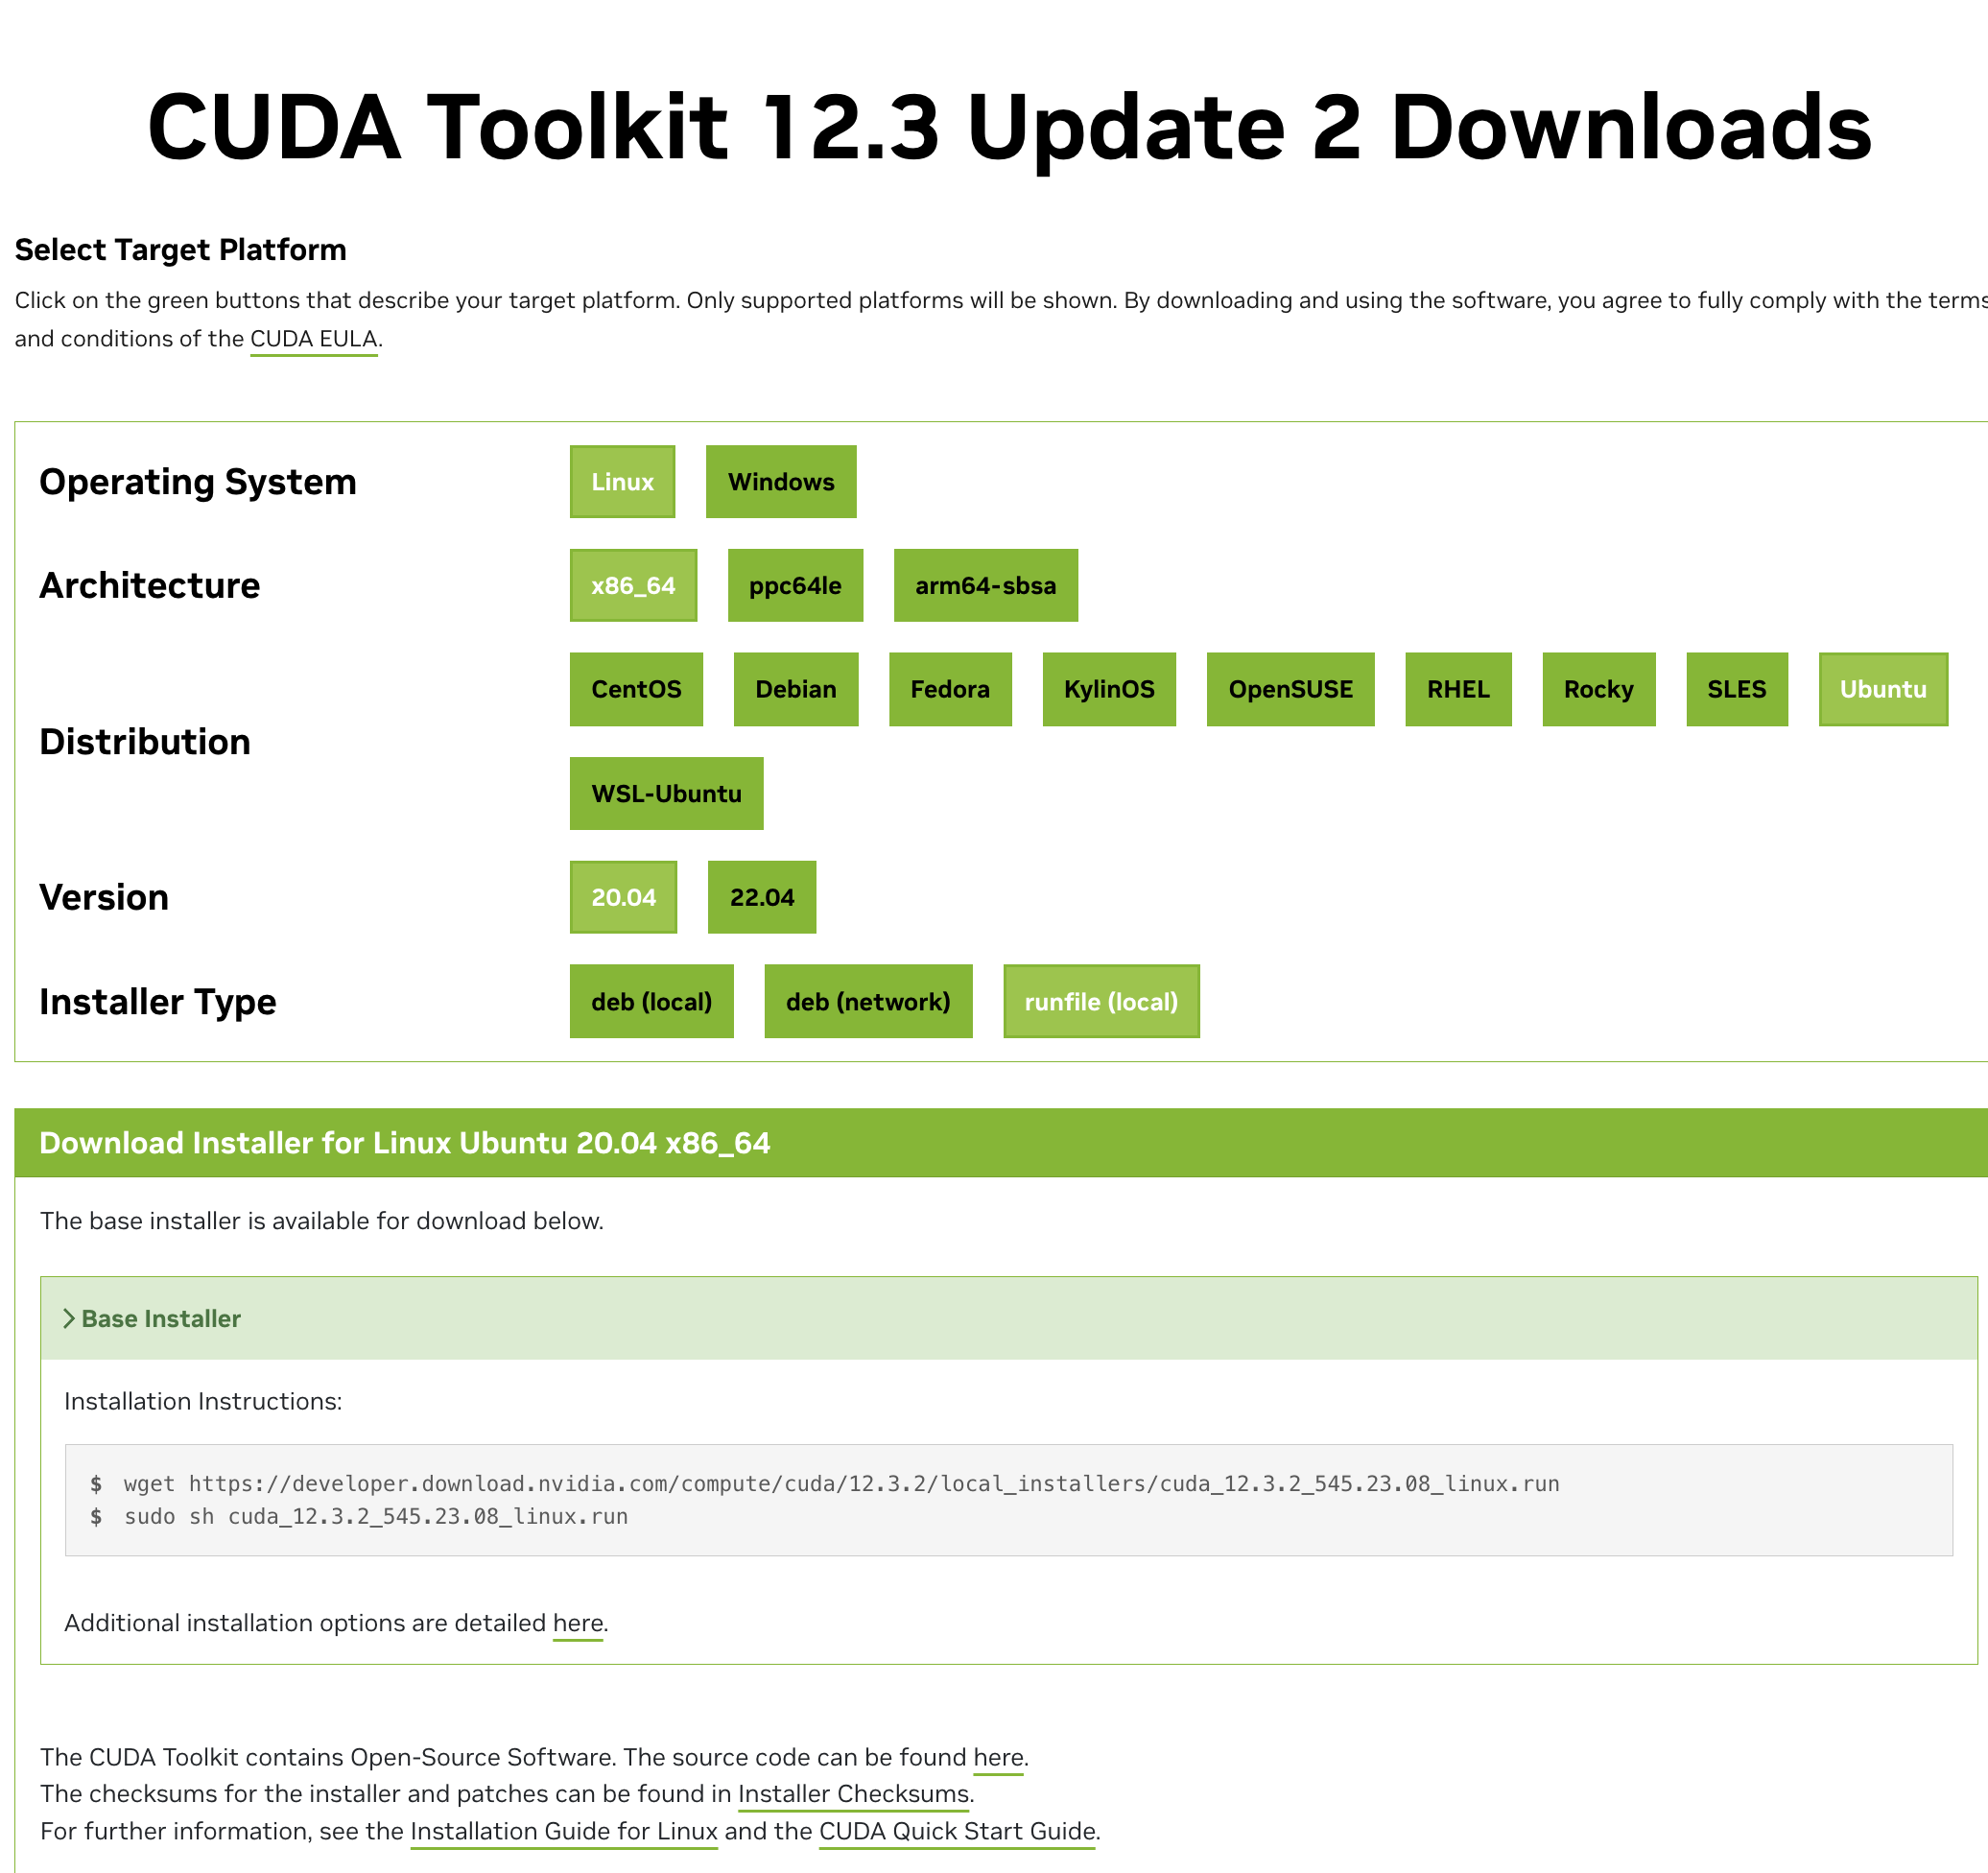
和同事商量好后,决定升级显卡驱动,因为这台服务器是给我们做技术验证用的,目前也就我俩在使用,没有过多的项目在上面跑,即便搞不定,装回原来的版本就行,相对风险可控,且后面跑新项目也能用上,和同事确定好了时间窗口,就开始操作了,选择的是直接安装 CUDA Toolkit。
安装 CUDA
稍微解释下为啥不直接去 nvidia 的驱动下载页面直接下载驱动,而是先安装 CUDA,是因为一般 cuda 会带驱动,且是兼容版本的。PS: 如果是有多个 cuda 的场景,那就安装个驱动能支持的 cuda 尽可能高的版本。
先对老驱动进行卸载,咱也不知道之前是怎么安装的,就挨个都试了下
$ lsmod | grep nvidia.drm
$ sudo systemctl isolate multi-user.target
$ sudo modprobe -r nvidia-drm
$ lsmod | grep nvidia.drm

$ sudo apt purge nvidia-*
$ sudo apt purge libnvidia-*
$ sudo apt autoremove
# 检查是否还有
$ dpkg -l | grep -i nvidia
然后官网上按照要求选择的版本执行安装 CUDA Toolkit 12.3 Update 2 Downloads [一个图]
$ sudo chmod a+x cuda_12.3.2_545.23.08_linux.run
$ sudo sh cuda_12.3.2_545.23.08_linux.run
┌──────────────────────────────────────────────────────────────────────────────┐
│  End User License Agreement                                                  │
│  --------------------------                                                  │
│                                                                              │
│  NVIDIA Software License Agreement and CUDA Supplement to                    │
│  Software License Agreement. Last updated: October 8, 2021                   │
│                                                                              │
│  The CUDA Toolkit End User License Agreement applies to the                  │
│  NVIDIA CUDA Toolkit, the NVIDIA CUDA Samples, the NVIDIA                    │
│  Display Driver, NVIDIA Nsight tools (Visual Studio Edition),                │
│  and the associated documentation on CUDA APIs, programming                  │
│  model and development tools. If you do not agree with the                   │
│  terms and conditions of the license agreement, then do not                  │
│  download or use the software.                                               │
│                                                                              │
│  Last updated: October 8, 2021.                                              │
│                                                                              │
│                                                                              │
│  Preface                                                                     │
│  -------                                                                     │
│                                                                              │
│──────────────────────────────────────────────────────────────────────────────│
│ Do you accept the above EULA? (accept/decline/quit):                         │
│                                                                              │
└──────────────────────────────────────────────────────────────────────────────┘

┌──────────────────────────────────────────────────────────────────────────────┐
│ CUDA Installer                                                               │
│ - [X] Driver                                                                 │
│      [X] 545.23.08                                                           │
│ + [X] CUDA Toolkit 12.3                                                      │
│   [X] CUDA Demo Suite 12.3                                                   │
│   [X] CUDA Documentation 12.3                                                │
│ - [ ] Kernel Objects                                                         │
│      [ ] nvidia-fs                                                           │
│   Options                                                                    │
│   Install                                                                    │
│                                                                              │
│                                                                              │
│                                                                              │
│                                                                              │
│                                                                              │
│                                                                              │
│                                                                              │
│                                                                              │
│                                                                              │
│                                                                              │
│                                                                              │
│                                                                              │
│ Up/Down: Move | Left/Right: Expand | 'Enter': Select | 'A': Advanced options │
└──────────────────────────────────────────────────────────────────────────────┘

===========
= Summary =
===========

Driver:   Installed
Toolkit:  Installed in /usr/local/cuda-12.3/

Please make sure that
  -   PATH includes /usr/local/cuda-12.3/bin
  -   LD_LIBRARY_PATH includes /usr/local/cuda-12.3/lib64, or, add /usr/local/cuda-12.3/lib64 to /etc/ld.so.conf and run ldconfig as root

To uninstall the CUDA Toolkit, run cuda-uninstaller in /usr/local/cuda-12.3/bin
To uninstall the NVIDIA Driver, run nvidia-uninstall
Logfile is /var/log/cuda-installer.log
Failed to initialize NVML 问题排查
基本上就是一路 next 就行,根据最后的 summary 设置好 vim /etc/profile,然后重启,到此为止,基本上就大功告成,开始验证。
$ cat /proc/driver/nvidia/version
NVRM version: NVIDIA UNIX x86_64 Kernel Module  545.23.08  Mon Nov  6 23:49:37 UTC 2023
GCC version:  gcc version 9.4.0 (Ubuntu 9.4.0-1ubuntu1~20.04.2)

$ nvidia-smi
Failed to initialize NVML: Driver/library version mismatch
NVML library version: 545.23
结果发现了不适配的问题 😨,然后继续找资料分析原因是什么,结论都是安装的版本不对,好嘛那就把不同的安装方式都试一下,重复之前的卸载过程。
# 根据上面的提示安装对应的版本
$ ubuntu-drivers devices
$ sudo apt install nvidia-driver-545
dkms
等安装完后,重启,还是不行,但是在搜索的过程中,这篇NVIDIA-SMI报错,dkms的都试了还不行,怎么办?里有个陌生的关键词引起了注意 dkms,那就试试?
$ dkms status
dkms: command not found
$ sudo apt install dkms
$ dkms status
Error! Could not locate dkms.conf file.
File: /var/lib/dkms/nvidia/520.61.05/source/dkms.conf does not exist.
果然有新发现,这个版本号 520.61.05 不就是之前安装的版本么?盲猜大概率是跟这个有关系。一顿搜索 dkms 的资料,发现这个是用来管理内核模块的,突然有点慌怎么就扯到内核了,本来想通过 dkms 自带的命令来看能不能卸载或者删除掉 nvidia 相关的东西,结果一直报上面找不到 dkms.conf 的错误,然后就去 /var/lib/dkms/ 下面看了下,原来这个 nvidia 是软链到其他地方的目录,但是已经被删掉了,那就也把 nvidia 目录也删掉吧,然后再重新安装 CUDA Toolkit 12.3,重启,再次验证,一切顺利。
$ lspci | grep -i nvidia
3b:00.0 3D controller: NVIDIA Corporation GP102GL [Tesla P40] (rev a1)
af:00.0 3D controller: NVIDIA Corporation GP102GL [Tesla P40] (rev a1)
d8:00.0 3D controller: NVIDIA Corporation GP102GL [Tesla P40] (rev a1)

$ cat /proc/driver/nvidia/version
NVRM version: NVIDIA UNIX x86_64 Kernel Module  545.23.08  Mon Nov  6 23:49:37 UTC 2023
GCC version:  gcc version 9.4.0 (Ubuntu 9.4.0-1ubuntu1~20.04.2)

$ nvidia-smi
+---------------------------------------------------------------------------------------+
| NVIDIA-SMI 545.23.08              Driver Version: 545.23.08    CUDA Version: 12.3     |
|-----------------------------------------+----------------------+----------------------+
| GPU  Name                 Persistence-M | Bus-Id        Disp.A | Volatile Uncorr. ECC |
| Fan  Temp   Perf          Pwr:Usage/Cap |         Memory-Usage | GPU-Util  Compute M. |
|                                         |                      |               MIG M. |
|=========================================+======================+======================|
|   0  Tesla P40                      Off | 00000000:3B:00.0 Off |                  Off |
| N/A   33C    P8               9W / 250W |    107MiB / 24576MiB |      0%      Default |
|                                         |                      |                  N/A |
+-----------------------------------------+----------------------+----------------------+
|   1  Tesla P40                      Off | 00000000:AF:00.0 Off |                    0 |
| N/A   32C    P8               9W / 250W |      4MiB / 23040MiB |      0%      Default |
|                                         |                      |                  N/A |
+-----------------------------------------+----------------------+----------------------+
|   2  Tesla P40                      Off | 00000000:D8:00.0 Off |                    0 |
| N/A   30C    P8              10W / 250W |      4MiB / 23040MiB |      0%      Default |
|                                         |                      |                  N/A |
+-----------------------------------------+----------------------+----------------------+

+---------------------------------------------------------------------------------------+
| Processes:                                                                            |
|  GPU   GI   CI        PID   Type   Process name                            GPU Memory |
|        ID   ID                                                             Usage      |
|=======================================================================================|
|    0   N/A  N/A      2210      G   /usr/lib/xorg/Xorg                           96MiB |
|    0   N/A  N/A      2534      G   /usr/bin/gnome-shell                          9MiB |
|    1   N/A  N/A      2210      G   /usr/lib/xorg/Xorg                            4MiB |
|    2   N/A  N/A      2210      G   /usr/lib/xorg/Xorg                            4MiB |
+---------------------------------------------------------------------------------------+
总结
最终如愿启动
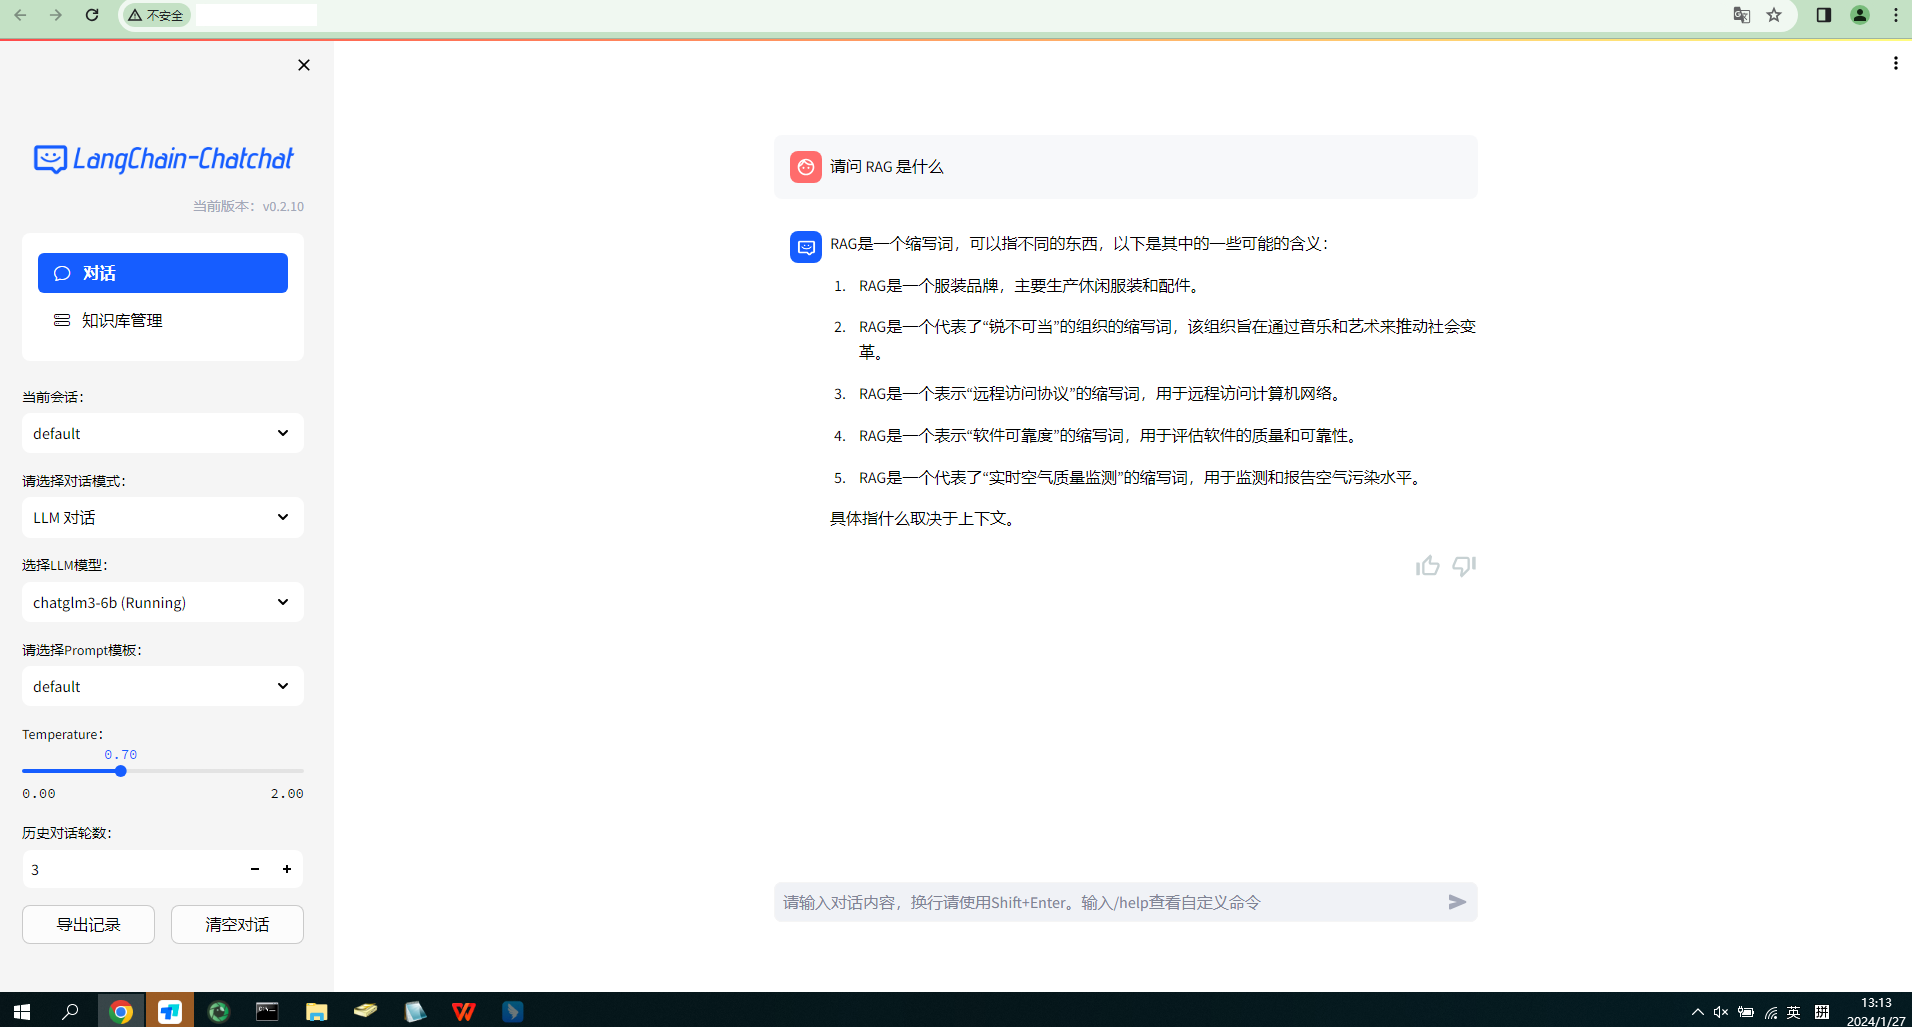 终于水完了,过程中其实还有蛮多细节没有记录📝,回头看也是非常简单的一件事情。如果一开始重装的时候,稍微花点时间去看看之前的驱动是如何安装的,就不会绕一大圈,简单总结下来正确的重装方式:
- 记录当前版本信息
- 按照之前安装的方式去正确卸载
- 通过
CUDA Toolkit安装驱动 - 重启
- 验证
PS:通过 CUDA Toolkit 安装的时候别选 Kernel Objects,除非你知道它是干嘛的,安装过程中选了它,结果安装失败,提示缺少 mofed,发现居然一个网卡驱动,放弃了,太复杂,主要是第一项检查都没通过
$ lspci -nn | grep Eth | grep Mellanox
# 啥都没有
参考:
- https://docs.nvidia.com/networking/display/mlnxofedv461000/installing+mellanox+ofed
- https://docs.daocloud.io/network/modules/spiderpool/install/ofed_driver/
后面继续更新运行项目的过程,以及遇到的问题:
- 向量数据库换成 es
- Confluence 数据的获取和 Embedding
